
How to Cut Yarn Fringes Without Mess or Effort: Image Tutorial
Fringes are a beautiful finishing choice for rugs, scarves, and knitted pieces. This image tutorial, “How to Cut Yarn Fringes Without Mess or Effort,” will guide you through a trick that eliminates crafting mess- for once! On the contrary, it will help you make your fringes effortlessly, with no need to worry about scraps.
Materials Needed:
- Yarn
- Ruler
- Painter’s tape or adhesive tape
- Scissors
- Measuring tape (optional)
Step-by-Step Guide: How to Cut Yarn Fringes Without Mess or Effort
- 1. Prepare Your Fringes
Begin by preparing your fringes. Either knot the pieces of yarn together or add extra pieces to the area you want to decorate. Make sure everything is secure and ready for trimming.
- 2. Flatten and Arrange the Fringes:
Lay your piece flat on a work surface and arrange the fringes. Untangle them and straighten them to ensure they are neat and ready for cutting.

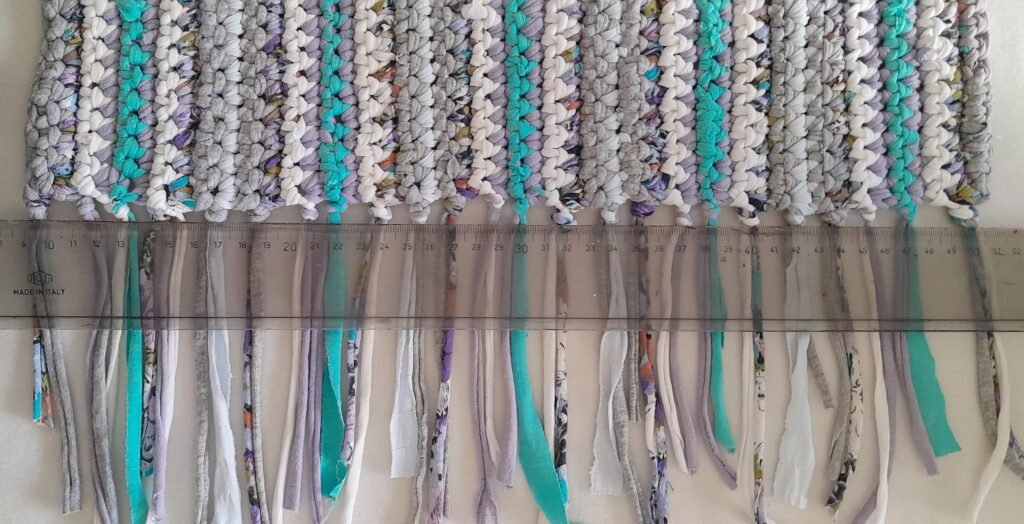
- 3. Align the Ruler
Place a ruler parallel to the edge of your piece, close to where your fringes begin. This will help you keep a straight line, hold your piece in place, and allow for symmetrical cutting.
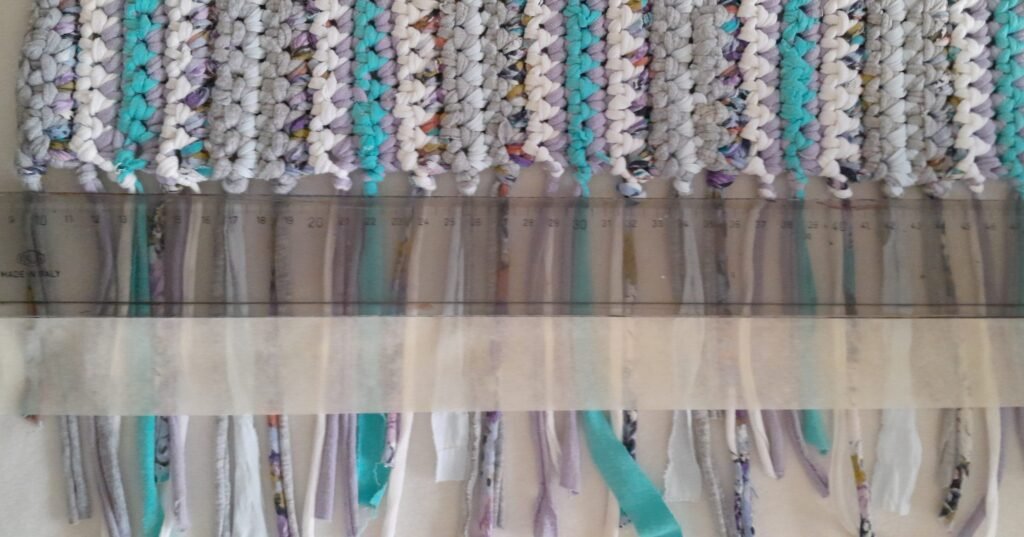
- 4. Apply Painter’s Tape
Stick a piece of painter’s tape or any adhesive tape next to the ruler, covering the area where you want to make the cut. Press the tape firmly so that the fringes stick to it.
- 5. Measure and Mark
Measure the desired length for your fringes from the end of your piece. In this tutorial, the fringes are cut at 6 cm (approximately 2 ½ inches). If possible, draw a straight line on the painter’s tape to mark where you’ll cut.
- 6. Cut Along the Tape
Using sharp scissors, carefully cut through both the fringes and the painter’s tape. This will ensure the fringes are cut evenly.

- 7. Remove the Tape
Gently peel off the painter’s tape from your piece. The fringes should now be evenly trimmed, and the leftover scraps will be stuck to the tape, allowing for easy cleanup.
- 8. Repeat as Needed
Repeat the process for any other sides of your piece where fringes are needed.

Final Touch: Trim After Washing
Once your piece is washed, you may notice some threads that are slightly longer than others. Simply trim them to ensure a polished, even look.
And there you have it! This image tutorial on How to Cut Yarn Fringes Without Mess or Effort gives you a simple, mess-free technique that’s easy to put into practice. I hope it helps you finish off your beautiful pieces beautifully! You can give it a try in one of the three rugs in this tutorial.