

Once you’ve made a no-sew fabric sandwich wrapping, you might want to give it an upgrade with a finishing touch, especially if the edges are a bit raw. In the “No-Sew Fabric Sandwich Wrappings with Crochet Finishing Details” tutorial, we’ll add an easy crochet trim around the edges of your wrapping. This will provide an extra touch of style with minimal time and effort.
How to Make No-Sew Fabric Sandwich Wrappings with Crochet Finishing Details
Level: Easy
Techniques Required:
Materials:
- Waterproof fabric sandwich wrappings (Check out our tutorial on making these wraps.)
- Cotton yarn (In this tutorial, we use cotton yarn that suggests a size 4/G6 hook on the label, but we’ll use a size 1.10/11 crochet hook for smaller, more discreet holes.)
- Small crochet hook (here we will be using a 1.10/11 crochet hook)
- Needle or sharp metallic object
- Candle (optional for heating the needle)
- Ruler
- Pencil or washable markers
Preparation
1. Mark the Fabric
Use a pencil to draw a line 0.5 cm (0.2 inches) from the edge of the wrapping, marking the entire perimeter.
2. Make Dot Marks
Along the marked line, use a ruler to make dots every 1 cm (0.4 inches). These dots will indicate where the holes for crocheting will be. Ensure that a dot is placed at each corner, adjusting the spacing slightly if necessary. If your edges are rounded, go around the edges making the same dots with the rest of the piece.
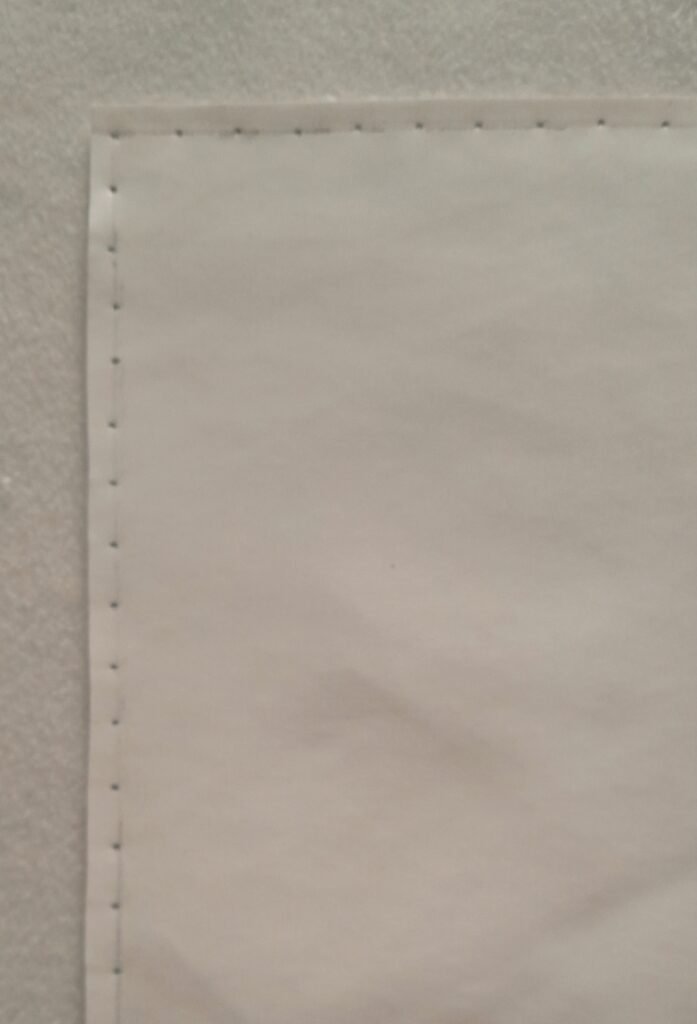
3. Create the Holes
If your crochet hook has difficulty piercing the fabric, pre-make small holes at each dot before you start crocheting. Since waterproof fabrics often contain plastic, the easiest method to create holes is by heating a needle over a candle and then carefully pushing it through the fabric at each dot. Be cautious with the flame and fumes.
Warning:
Be extremely cautious when using an open flame. Work in a well-ventilated area, and avoid inhaling the fumes from the heated plastic. Keep a safe distance from the flame and ensure that the fabric doesn’t catch fire.
Alternatively, use a sharp metallic object, like a thin crochet hook (without the hook end), to make the holes.

Crocheting the Piece
1. Start with a Chain
Begin with a chain that will serve as one of the ties for your sandwich wrapping. In this tutorial, for a 40 x 32 cm (16 x 12.6 inches) wrapping, there is a 50 cm (20 inches) chain.
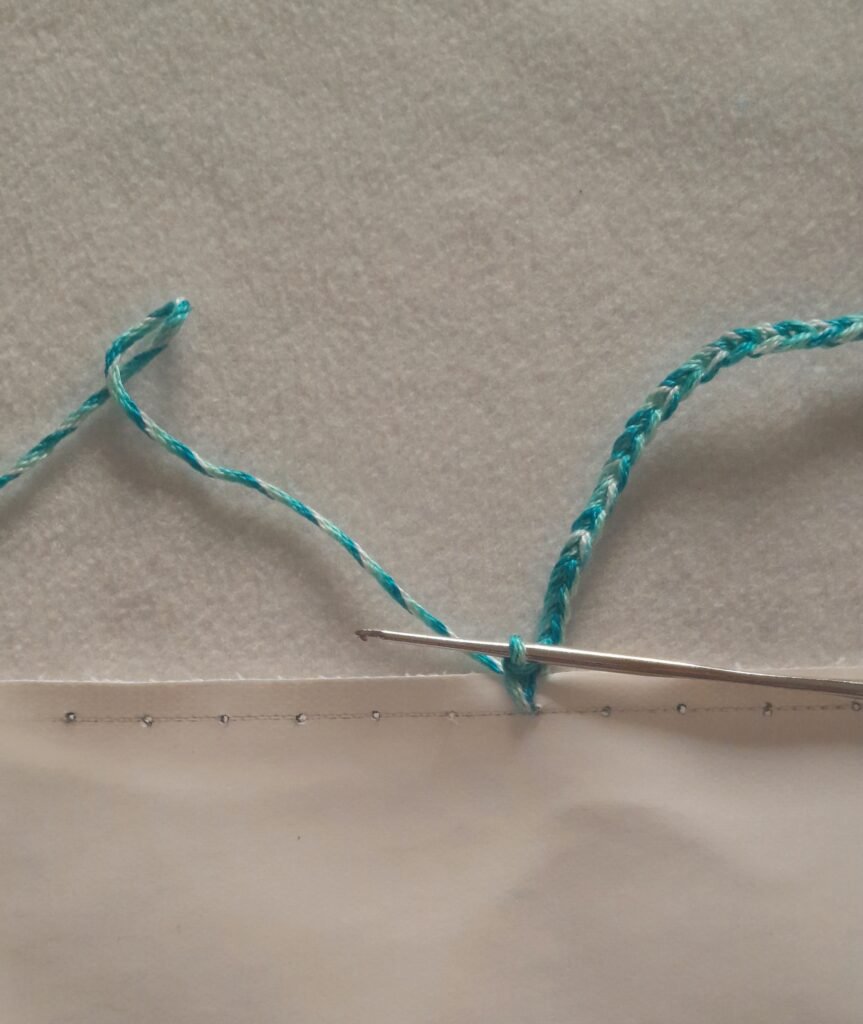
2. Work the Sides
With the last chain on your hook, insert the hook into the middle hole of one long side of the wrapping. Yarn over, pull through the hole, and crochet 1 single crochet followed by 1 chain stitch. Repeat this for each hole along all sides except corners.
3. Crochet the Corners
When you reach a corner, crochet 1 single crochet followed by 1 chain stitch, repeating this three times into the same corner hole. This will create a neat, rounded corner. If you have curved corners, follow the dots and the pattern.

4. Finish the Last Side
When you reach the final hole, crochet the final single crochet and 1 chain stitch. Use slip stitch to connect it to the first single crochet of your piece and then crochet a long chain to create the second tie for the sandwich wrapping. In this tutorial, for a 40 x 32 cm wrapping, there is a 60 cm (24 inches) chain.

5.Finishing Touches
Once you’ve completed crocheting around the edges, cut the yarn, pull it tight, and trim any excess. Do the same for both ends.

Learn from my mistakes:
Using a crochet hook smaller than the one suggested by the yarn manufacturer can be beneficial because it reduces the size of holes in your project. However, it requires careful attention. Sometimes, not all the threads of the yarn get caught in the crocheted stitch. Since you’ll be crocheting on the wrong side of the item, it’s a good idea to stop occasionally and check the right side for any stitches with loose threads that may need reworking.
Another important point is tension. The stitches need to be loose enough to fill the gaps between the two markers, so it’s essential to work them loosely. Your goal is to achieve the same result as if you were using the recommended hook size, even though you’re working with a smaller one.
Conclusion
And that’s it! You’ve now added a simple and stylish crochet trim to your no-sew fabric sandwich wrapping. The end result is not only functional but also beautiful. The method used in this “No-Sew Fabric Sandwich Wrappings with Crochet Finishing Details” tutorial can also be applied to other projects like fleece blankets or kitchen towels. Just follow the same process of marking and crocheting for a clean, decorative finish. Enjoy your sandwiches in style!
