
“Using Shrink Plastic in Crafts-Things to Know Before You Start” is an introductory article to what promises to be a long series of tutorials on this wonderful material. I just love it because it is versatile, easy to use, and ideal for both solo projects and crafts with kids. It’s economical, customizable, and offers quick results. It is perfect for making items with a personal touch – like the bracelets I’ll be sharing in an upcoming tutorial!
Before using shrink plastic in craft projects, I thought I would share some key things to know based on my own experience, that is the mistakes I have made!
Using Shrink Plastic in Crafts – Things to Know Before You Start:
1. Go for Sheets of Shrink Plastic
Some tutorials suggest using plastic food containers for shrink plastic crafts, but not all plastics work the same. After spending a “pleasurable” summer testing (and ruining) various plastic containers, I realized that only containers marked with the number 6 inside a recycling triangle can be used for shrink projects. In my experience, it’s better to buy shrink plastic sheets. They come in a variety of colors (you can even find printable sheets), and they are less fuss and more efficient—one 20 x 14 cm sheet will be enough to make 30 bracelets!
2. Shrinkage and Thickness
Shrink plastic typically shrinks to about 1/3 of its original size, but this can vary slightly depending on the manufacturer. The material also becomes nine times thicker when heated. If your project requires specific dimensions, make a test sample first. And don’t forget to punch any necessary holes before heating, as it will be much harder afterward!

3. Coloring Shrink Plastic
Not all coloring materials work well on shrink plastic. Permanent markers and colored pencils are great options, each creating different effects. On the other hand, school markers and correction fluid tend to fade- I know this the hard way. For any other coloring material ideas, try baking a sample (and please share your insights if you discover something new!).
4. Correcting Mistakes
If you’re not satisfied with your drawing or design, don’t worry—there’s room for correction. Pencil and colored pencil markings can be erased, while permanent markers can be removed with rubbing alcohol. The sooner you wipe off the permanent marker, the better the results. I always keep cotton pads and rubbing alcohol on hand when working with shrink plastic for in-spot corrections.
5. Efficient Use of Material
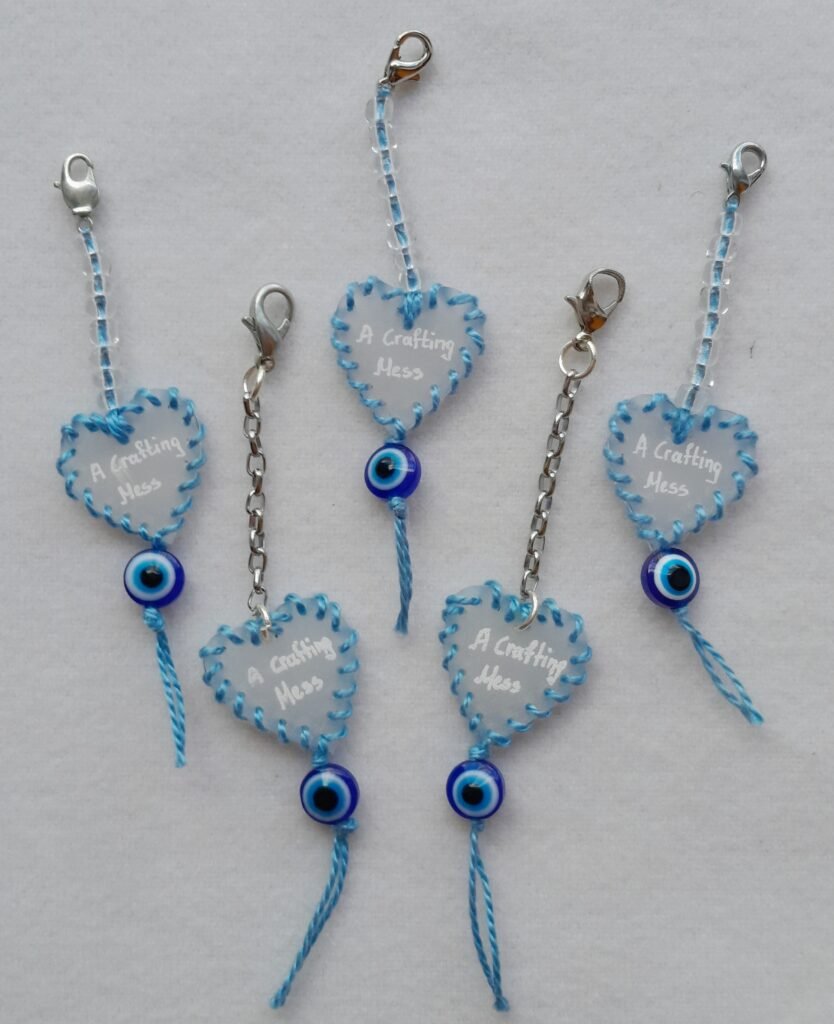
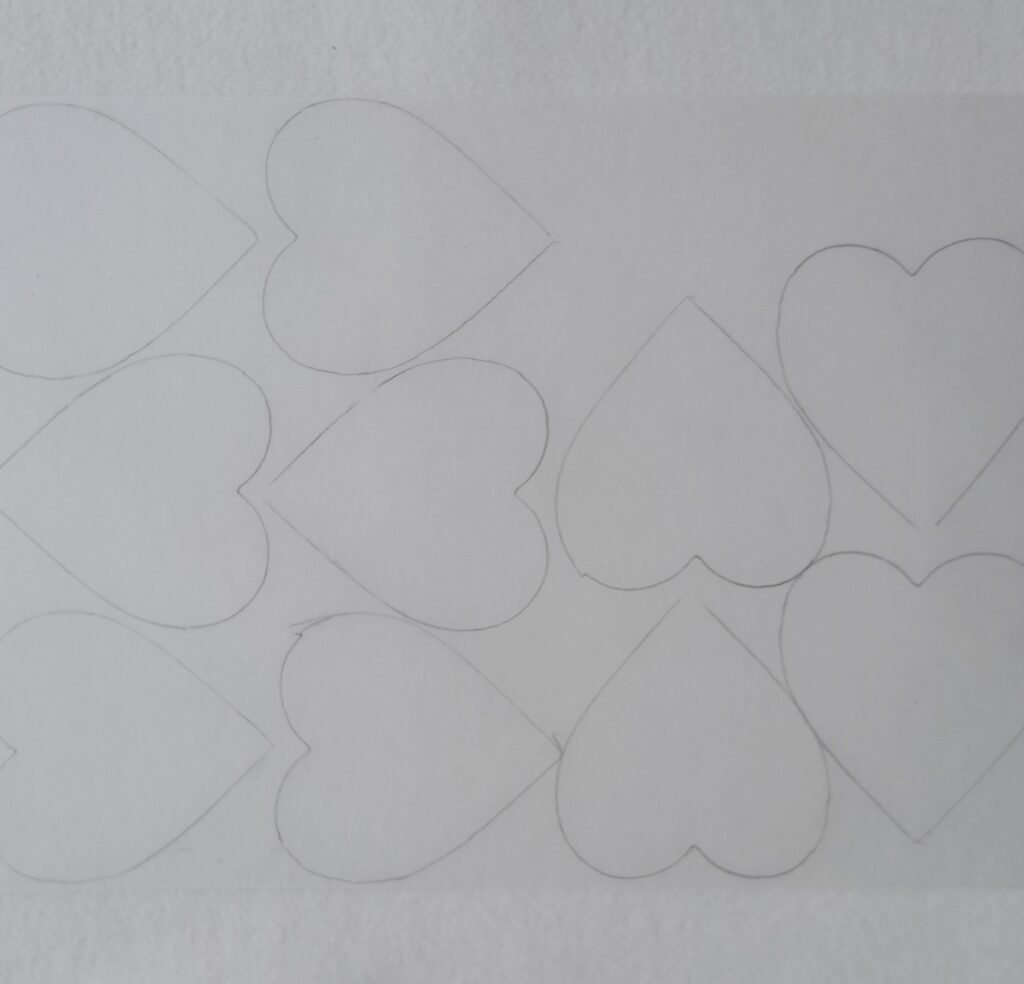
To economize on material, arrange your designs as closely as possible on the shrink plastic sheet. For designs with curves, such as hearts, I find that small, rounded manicure scissors work best.
When working with kids, it’s helpful to pre-cut the plastic into squares of the final dimensions. This ensures their drawings will shrink into the desired shape. I learned this after a child enthusiastically made a beautiful, but far too large, drawing that couldn’t shrink properly.
6. Punching Holes
While a double-hole punch from school or the office can be used, it lacks precision. For better results, invest in a single-hole punch—they’re inexpensive and give you more control. Also, in some projects, the double-hole punch leaves a bigger hole that might look too big for delicate projects.
7. Heating Techniques
You can shrink plastic using a hot air gun, but be extremely careful with this thing! A conventional oven works great in most cases. Follow the manufacturer’s instructions; the shrink plastic I am now using recommends heating for 1-2 minutes at 150°C (302°F). Note: Microwave ovens are not suitable for shrinking plastic.
8. Use a Jar Lid to Straighten Baked Pieces
When I take my baked pieces out of the oven, I always have a jar lid nearby. If I notice a piece is slightly upturned, I use the lid to press it down for just a moment. Of course this works when the pieces are still hot.
Learn From My Mistakes
I once ordered what I thought was a great deal on shrink plastic online, only to receive shrink film instead. Shrink film is a very thin plastic used to wrap 6-packs of beverages and is not suitable for crafts. I still haven’t figured out what to do with this… Make sure you’re purchasing shrink plastic sheets, not shrink film!
Conclusion
If you haven’t tried shrink plastic yet, I suggest you buy yourself some supplies as soon as possible. There are some great ideas coming up and the tips in “Using Shrink Plastic in Crafts – Things to Know Before You Start” article will help you avoid some pitfalls and enjoy the process from day 1. I have personally tried it with adults, kids and teenagers, and every single person created amazing drawings and thoroughly enjoyed the process (okay, except from the kid with the huge drawing I mentioned earlier).