
Rugs are an excellent project for beginners to explore when learning how to crochet. In “Tutorials for Crocheting the Easiest Customizable Tshirt Rugs”, I will walk you through three different rug designs, all made with T-shirt yarn. These projects gradually increase in difficulty from the first to the third, allowing you to build your skills as you progress. This tutorial includes step-by-step instructions for each rug, as well as links to additional tutorials on T-shirt yarn preparation, fringe-making, and specific crochet stitches.
Why These Are the Easiest Customizable Rugs You Can Crochet
These rugs are particularly easy and customizable for several reasons:
- Simple Stitches: They are made using just one basic crochet stitch (single crochet).
- Easy Repetition: Each row follows the same simple set of instructions.
- Minimal Counting: There is little counting involved, reducing complexity.
- Color Switching Without Securing: You don’t need to worry about securing colors before switching.
- Built-in Fringe: The fringe is created as you crochet, saving time and effort.
- Customization: You can fully personalize the rug’s color scheme and dimensions to fit your needs.
- Supportive Tutorials: Additional tutorials provide guidance for new techniques or areas that might be challenging.
- Cost-Effective and Eco-Friendly: They are free of cost, repurposing old T-shirts, making them budget-friendly and environmentally conscious.

Tutorials for Crocheting the Easiest Customizable Tshirt Rugs: Instructions for All Three Rugs
All three rugs follow the same core principles: crochet individual rows and use the beginning and ending of each row to form fringes. You can adapt these instructions to create your own pattern or follow the specific patterns for each of the three rugs described below. The rugs vary mainly by their dimensions, required materials, and the complexity of their color schemes.
General Information:
- Level of Difficulty: Easy
- Techniques Required: Chain stitch, single crochet, making T-shirt yarn, creating fringes.
- Gauge Swatch: The rugs were made with a 6 mm/US I-10 crochet hook for T-shirt yarn. The gauge swatch is 10 stitches and 12 rows per 10 cm (4 inches) square.
Tip: If possible, get a crochet hook specifically designed for T-shirt yarn. These hooks are lighter than normal crochet hooks, reducing hand strain.
Materials:
- T-shirt yarn- for a suggestion on how to estimate your yarn quantity, have a look at this article. You can also get ideas about color compilations from this article
- A crochet hook suited for T-shirt yarn (preferably 6 mm)
- Scissors
- Measuring tape
Crochet Pattern for All Three Rugs:
1. Select Your Color Scheme Tip: Choosing an even number of rows per color will create symmetry in the final rug. You can find more information about color selection in the accompanying tutorial.

2. Foundation Chain: Leave a tail of approximately 15 cm (6 inches) and start by chaining the desired number of stitches with your first color. The number of chains will determine one dimension of the rug (width or height). When finished, leave a 15 cm (6 inches) tail.
3. Row 1
With the first color, leave a 15 cm (6 inches) tail. Insert your hook into the last chain of the foundation chain, pull through the yarn, chain 1, and crochet 1 single crochet. Continue by crocheting 1 single crochet in each consecutive chain. After completing the row, leave another 15 cm (6 inches) tail and cut the yarn. Turn your work over to crochet the next row on the opposite side.

4. Row 2 and Subsequent Rows
Continue as you did in Row 1. For each row, leave a 15 cm (6 inches) tail at the beginning and end. Chain 1 at the start of each row and crochet 1 single crochet in each stitch across. Turn your work over to crochet the next row on the opposite side.

5. Change colors according to your selected color scheme until the rug reaches your desired dimensions.

6. Creating the Fringe
After completing your rug, tie knots with the tails of yarn at each end to secure the edges. Use two tails of yarn per knot. Ensure that the stitches are pulled tight before making the knots. Trim the fringes to a uniform length of approximately 6 cm (2 ½ inches). You can find a practical solution on how to cut fringes evenly in the accompanying tutorial.

Tutorials for Crocheting the Easiest Customizable Tshirt Rugs: Instructions for the Blue Rug
The blue rug is the simplest of the three and an ideal starting point for beginners. This rug features a straightforward color scheme where colors are used one after the other, without the need for complex arrangements. The photos in the general instructions refer to this rug.
Dimensions:
- Width: 60 cm (23 5/8 inches)
- Height: 37 cm (14.6 inches)
- Stitches: 60 stitches per row x 44 rows
- Weight: 590 g (1.3 lb)

Materials:
This rug can be completed using T-shirt yarn made from approximately 6 medium-sized T-shirts. For more details on how to estimate yarn requirements based on weight, refer to the T-shirt yarn estimation tutorial (the rug appears as a case study there).
Color Scheme:
The rug consists of 6 colors, each used once per repetition of the pattern. A total of 7 full repetitions are required, plus 2 extra rows from the first two colors to complete the rug’s height.
- Color A: White (8 rows, 80 g)
- Color B: Petrol Blue (8 rows, 96 g)
- Color C: Light Gray (7 rows, 105 g)
- Color D: Navy Blue (7 rows, 126 g)
- Color E: Dark Blue (7 rows, 98 g)
- Color F: Dark Gray (7 rows, 112 g)

Instructions:
Start with a foundation chain using Color A (white). Use the general instructions and your color scheme to complete 7 repetitions, finishing with two final rows in Color A and Color B. Once done, make the fringes following the general instructions provided earlier.
Tip: Always double-check the color sequence before moving forward with a new row. A good idea is to make a reference sample with scraps of yarn in the order of your color pattern.
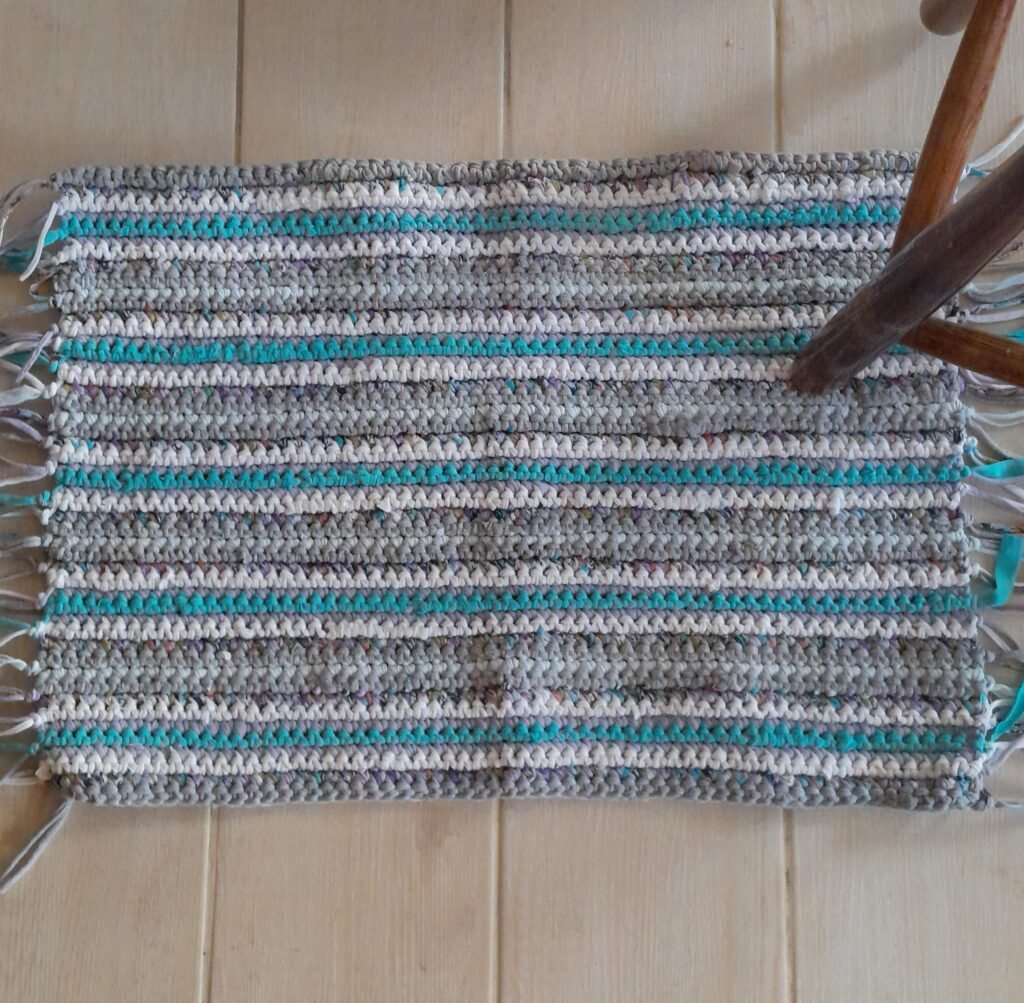
Tutorials for Crocheting the Easiest Customizable Tshirt Rugs: Instructions for the Gray and Purple Rug
This rug has similar dimensions to the blue one but adds an additional level of complexity by incorporating a symmetrical color scheme.
Dimensions:
- Width: 60 cm (23 5/8 inches)
- Height: 42 cm (16 1/4 inches)
- Stitches: 60 stitches per row x 50 rows
- Weight: 570 g (1.3 lb)
Materials:
The colors that appear twice in the color scheme will probably be covered with a medium T-shirt each, but it is not certain. My advice would be to estimate the quantity you have by weighing them. In the related tutorial, this rug appears as a case study where things didn’t initially go well.

Color Scheme:
This rug requires a total of 10 rows per color repetition. For symmetry, some colors are used twice in each repetition, framing a single row of color. Five full repetitions are required to reach the desired height.
- R1: White (2 rows per repetition, 10 rows total, 120 g)
- R2: Multi-color (2 rows per repetition, 10 rows total, 110 g)
- R3: Light Purple (2 rows per repetition, 10 rows total, 105 g)
- R4: Gray (2 rows per repetition, 10 rows total, 130 g)
- R5: Light Green (1 row per repetition, 5 rows total, 60 g)
- R6: Gray
- R7: Light Purple
- R8: Multi-color
- R9: White
- R10: Light Blue (1 row per repetition, 5 rows total, 70 g)
Instructions:
Start with a foundation chain using Color A (white). Use the general instructions and your color scheme to complete 5 repetitions. Once done, make the fringes following the general instructions provided earlier.
Tutorials for Crocheting the Easiest Customizable Tshirt Rugs: Instructions for the White and Gray Rug
This rug differs from the previous two by by having fringes on both the top and bottom edges. Additionally, it is larger, measuring about 1.5 times the size of the other rugs.
Dimensions:
- Width: 40 cm (15 ¾ inches)
- Height: 80 cm (31 ½ inches)
- Stitches: 40 stitches per row x 96 rows
- Weight: 780 g (1.7 lb)
Color Scheme:
This rug requires a total of 6 rows per color repetition. For symmetry, some colors are used twice in each repetition, framing a single row of color. Sixteen full repetitions are required to reach the desired height.

- R1: Gray (2 rows per repetition, 32 rows total, 320 g)
- R2: White (2 rows per repetition, 32 rows total, 260 g)
- R3: Dark Blue (1 row per repetition, 16 rows total, 128 g)
- R4: White
- R5: Gray
- R6: White and Blue (1 row per repetition, 16 rows total, 120 g)
Materials:
The colors used twice per repetition typically require yarn from three medium-sized T-shirts each. Colors used once may require yarn from one medium-sized T-shirt. Be sure to measure your T-shirt yarn. The tutorial on yarn estimation will assist you.
Instructions:
Start with a foundation chain using Color A (gray). Use the general instructions and your color scheme to complete 16 repetitions. Once done, make the fringes following the general instructions provided earlier.
Tip: When you want to crochet big rugs, it is a good idea to base your color scheme on basic colors that you can easily supplement from other garments- like white, black or gray.
Learn from my Mistakes
While working on the whitish rug, I made a mistake and paid the price for it. Although I weighed the yarn and found garments with similar colors, I didn’t cut them all at the beginning of the project. I was just too impatient to start.
When the first two gray garments ran out, I started cutting and using the third one. To my dismay, I realized that the third had a different shade of gray. If you look closely at the picture, you can see that the right side is a bit different from the left one. It’s not very noticeable, but it is a flaw.
Had I weighed and cut the yarn at the start, I could have alternated the two shades of gray in the repetitions, which would have given me a more symmetrical piece. The good news is that on the other side, the difference is not so obvious, which at least gives me a way out.
That’s why, from my experience, it’s wise to weigh and cut the amount of yarn needed for the project beforehand, perhaps even preparing some extra yarn. By alternating the repetitions, both sides would have turned out equally well.
Conclusion:
I hope that ‘Tutorials for Crocheting the Easiest Customizable Tshirt Rugs ‘ has helped you create beautiful rugs that reflect your unique color choices and dimensions. Remember, with just a few simple stitches and some T-shirt yarn, the possibilities for customization are endless!
I would be thrilled to see your projects—please share your finished rugs and any creative twists you’ve added. Happy crocheting!”