

I love the surprised look I get when I tell people that bottlecap rings and some beads can be turned into sustainable bracelets. That’s one of the reasons I chose this project to kick off “The Surprising Ones” section of the blog. It also embodies the philosophy of “making the best you can with what you have,” since you can use materials you already have. Additionally, it’s a simple project that anyone can try, and you’ll find all the help you need through the steps provided.
The “Bottlecap Rings and Beads Turned Into Sustainable Bracelets’ tutorial helps you craft unique pieces that are both affordable and stylish. It also allows you to infuse your own personality into each creation. The tutorials on stringing beads and crocheting will guide you through each technique, while the cardboard pattern ensures your rows remain untangled. The visuals and “learn from my mistakes’ section at the end of the post will also assist you..
Instructions for “Bottlecap Rings and Beads Turned Into Sustainable Bracelets”
Level of Difficulty:
Easy
Techniques Required:
Stringing beads, crocheting chain, crocheting slip stitch, basic hand sewing
Materials

Pattern:
- A piece of cardboard
- Markers
- a ruler
- A box cutter
- Measuring tape to measure your wrist
Crochet part:
- Thin nylon, silk, or rayon crochet thread for lace or embroidery (cotton can also be used). We are looking for a thin thread that can be worked with a small-size crochet hook. I used rayon in the cream bracelet with a size 0.75/US 14 crochet hook. The white one is made with thin cotton thread and a size 1/US 12 lace crochet hook. For the dark green one, I used a skein of DMC thread, color 986, and a 0.75/US 14 crochet hook.
- Small, round seed beads (1-4 mm each- type 10/0, 8/0. 6/0, or similar) or metallic beads—basically any small-sized beads that you have or like. The cream bracelet is made with approx. 15 grams/0.53oz of size 0.3mm-8/0 seed beads, the dark green one with about 12 grams/0,42oz of the same beads, and the white one with approx. 20 grams/0,7oz of size 0.4mm-6/0 seed beads.
- Some scotch tape to keep rows in place.
Side part and clasp:
- 2 bottle cap rings of the same dimensions—the ones in the cream bracelet were 4 cm/1.6 in. Note that not all bottle cap rings are ideal for the job, but almost all of them can be used. In the “Learn from my mistakes” section after the instructions, you will find more details on the bottle cap rings. You’ll also get ideas on how to adjust the ones you have.
- (Optional) Some nail polish of a shade similar to the color of the thread. Paint the rings if you think their color might show through the wrapping (mine did).
- Sewing needle
- A hook-shaped clasp
- Some jump rings
- A piece of chain, or you can use 4-5 jump rings together instead.
- Needle-nose pliers to open the jump rings
Steps for “Bottlecap Rings and Beads Turned Into Sustainable Bracelets”:
A. First, make the cardboard pattern.
- Take the measurements for the pattern: Measure your wrist and subtract 2 cm/0.8 in—this is your width (my wrist is 16 cm/6.3 in, so the pattern is 14 cm/5.5 in long). Press the bottle cap ring flat and measure it—this is the height of the pattern (in the cream one, it is 4 cm/1.6 in).
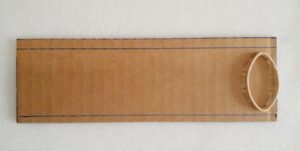
- Use the dimensions to cut a piece of cardboard—this is your pattern. At the top and bottom, leave approx. 1 cm/0.5 in allowance to ensure that the rows won’t fall off. Do not leave any allowance on the left and right sides.
B. Next, prepare the beads:
- Decide on your motif: I used a “3 chains, 1 chain with bead” motif, but you can choose a different one. The important thing is to stick to the motif you have chosen. It’s a good idea to make a demo row. This way, you will see how the motif looks and also make a rough estimation of the number of beads you need.
- Prepare the beads: Watch the video on how to string beads easily using your chosen thread. The finished piece will look better without any visible cuts and restarts in the thread, so it is best to mount all the beads you need at the beginning. Although it is a bit tiring, it pays off in the final result. If you need to cut the thread to add more beads, make sure the transition is on the side of the pattern because it can be hidden.
C. After that, crochet the chain with the beads:
- To start, leave a really long tail on your thread (about 100 cm/40 in) because we will use it to finish off the bracelet.

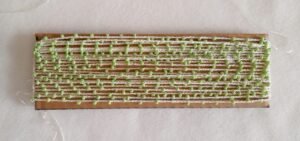
- Start crocheting the “3 chains, 1 chain with bead” motif or the one you have chosen. Once you have crocheted about 50 cm/20 inces of stretch, take the piece to your cardboard pattern. Use the scotch tape to secure the beginning on the top left of the pattern. Fold around the pattern—each row starts where the previous one finishes. Make sure there are no beads on the left or right edge of the pattern. We will later adjust these sides to the bottle cap rings, and any beads on the edges will create an obstacle. If there is a bead on the edge, stretch or loosen up the row to reposition the bead.
- Use a second piece of scotch tape to secure part of this first piece to your cardboard pattern, and continue crocheting. Every now and then, position the new rows around the pattern and check the edges. Continue until you cover the entire cardboard pattern.
- Finish off at the opposite side from where you started—this way, you will have the required thread tail at both edges. Cut the thread, leaving at least a 100 cm/40 in tail.
- .

- Secure all the rows together. Crochet slip stitch on the edges with the thread left: keep the thread over the rows, get the crochet hook under one row, yarn over, slip stitch, and repeat with all rows (the slip stitch video will help you). Repeat on the other side. Remove the crocheted piece from the cardboard pattern.

- The crocheted piece is now ready for the final stage.
D. Finally, make the ends of the bracelet:
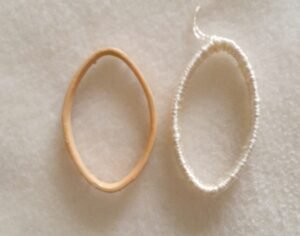
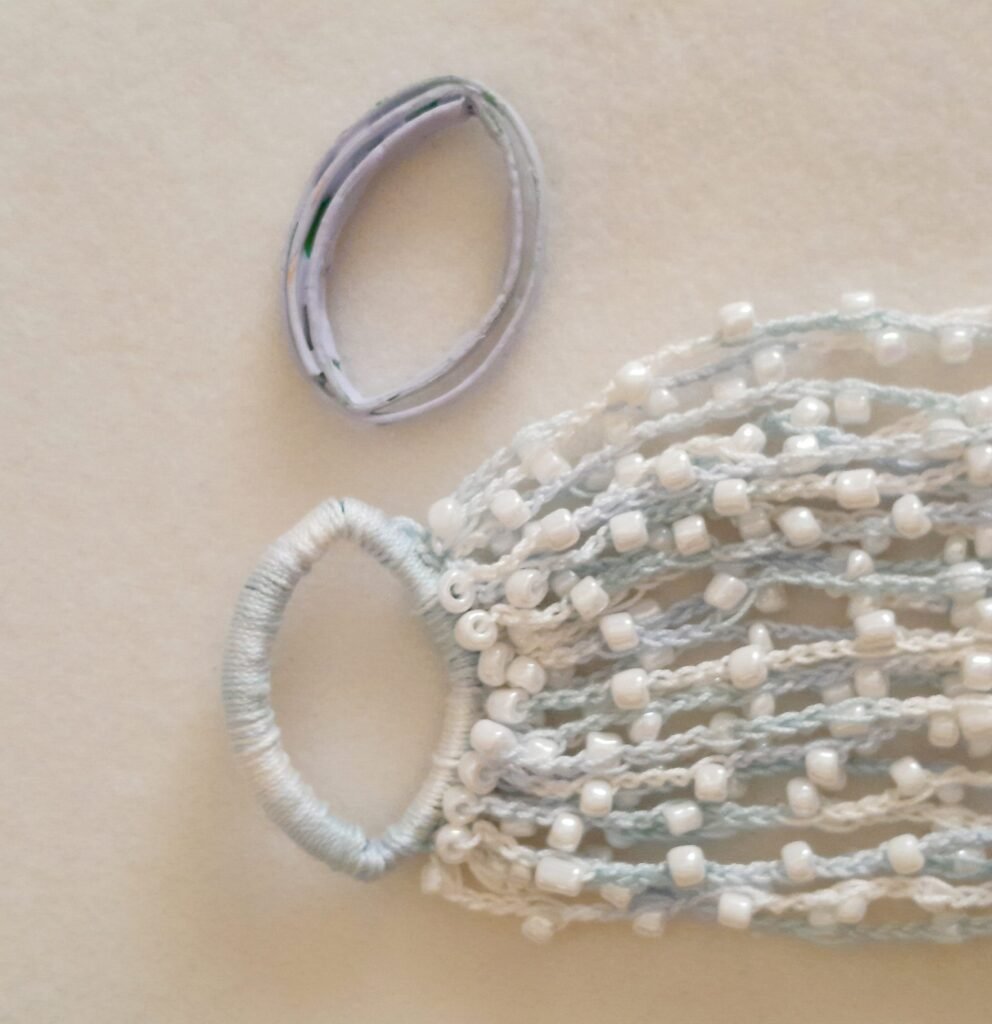
- Work on the bottle cap rings: Paint them (if needed) and use the same thread as in your crochet piece to cover the rings with thread. Use your thread double and a needle for quicker results (I used 2 pieces of 1.5 m/60 in thread). Take the thread in and out of the ring to wrap it all with thread. Cover the short end of the thread with the first rounds you make and cut any excess. Once you cover it all around, secure the thread with a knot at the external part of the ring. Cut any excess thread. Repeat for the other ring. Press the rings flat.
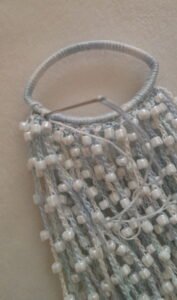
- Place one wrapped ring over one edge of the pattern. The corners of the ring are aligned with the end and the beginning of the rows, and the knot in the ring is close to the crocheted piece. Use the remaining thread from the crocheted piece and a needle to hand-sew them together. Your needle goes through the edges of the crocheted piece and through rows of string at the external bottom side of the ring. Ideally, do this once with wide stitches to secure correct placement and a second time with narrower stitches to ensure stability. Secure and cut any excess string. Repeat on the other side.
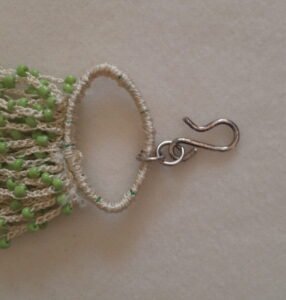
- To finish, use the pliers to open up 1 jump ring, place the hook, and close it. Open up a second jump ring, place it around the top part of the bottle cap ring, insert the jump ring with the hook, and close it. On the other side, open up 1 jump ring, place it around the top part of the bottle cap ring, insert the chain, and close the jump ring.
And there you have it—a bracelet that is easy, playful, environmentally friendly, and cheap. And I guess you will agree, it looks great with jeans.
Learning from My Mistakes
Problems that may occur with bottle cap rings
When I made my first bracelet, I found flaws that I have warned you about:
- The original color of the ring was visible, hence the nail polish.
- The sewing was visible, hence sewing on the bottom part of the ring.
What didn’t show up in the first draft was how the bottle cap rings can give a hard time. Indeed, in the first bracelet, the bottle cap rings gave a nice, diamond shape which was quite steady. When I made some more attempts, though, things got nasty. In the dark green one, the rings were so flexible that they didn’t keep their shape. The white was so oversized, that the completed bracelet looked like I had my wrist in plaster. So, I realized that:
- the rings shouldn’t be too flexible (shouldn’t bend easily) and
- 4 cm is the max that looks normal for such a bracelet.
However, I didn’t have any alternatives at this point. The new European law for tethered caps made it more challenging for me to find bottle cap rings. (The law ensures that the caps will be recycled together with small bottles. You can’t separate the caps easily but this ends with the rings having a rough perimeter. Still, there are products where the bottle cap ring is independent and smooth-keep an eye for those babies!). So, once again, I had to do the best I could with what I had.
Solutions for adjusting bottle cap rings
Here are some ideas in case you need to adjust the bottle cap rings you have:
- If your ring is too big, cut and coil it around. Make it look like one side is thicker and things will be fine. Have a look:
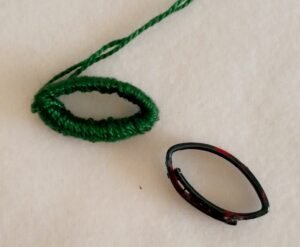
- If the ring is too flexible, use two rings together. You may need to cut the internal one to downsize it a bit, but it will do the trick. Here is an example:
Conclusion.
As you work on incorporating bottlecap rings into your bracelet, you’ll find that even small adjustments can make a big difference. The versatility of this project means you can experiment with different colors, beads, and threads to create a design that truly reflects your style. Don’t hesitate to experiment and make it your own! Plus, by reusing materials like bottlecap rings, you’re contributing to a more eco-friendly crafting practice.
I hope you have found the Bottlecap Rings and Beads Turned Into Sustainable Bracelets” tutorial helpful and that you got down to making a bracelet (or more). I am looking forward to seeing your creations. Please share them (and the post!)